
Quick Start Guide
Updated 05/24/2016
This article contains the critical information you need to know when setting up your Turbo Algae Scrubber in a short format, with links to the more in-depth articles that are specific to the individual items/steps.
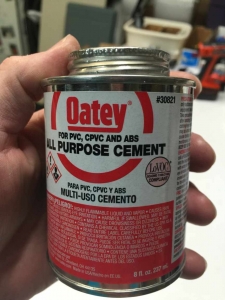
All Purpose Cement is ideal – one that lists both ABS and PVC on the label. In reality, most any cement is going to be fine, like Oatey Medium Clear. Just make sure to click the link above and follow Rule #2
I used to recommend trying to use Transition Cement, but this is not really necessary. What is more important is not applying primer OR cement/solvent to the ABS part – ONLY the PVC side. This is covered in Rule #2
- Do not apply primer OR solvent/cement to the ABS.
- Do not twist fittings back and forth when pushing together – turn the fitting only 1/4 rotation in a single direction as you push the parts together.
- Slot pipe is not reversible, choose orientation before bonding PVC adapters.
- Do not inter-connect fixture underneath the scrubber (connector is not submersible)
- Always unplug the power supply 5-10 seconds prior to opening either connector
- Always re-connect both connectors before plugging in power supply
- Fixtures must be operated with the cords coming out of the bottom
- Fixture positions may be swapped, no problem.
- Fixtures are packed with cords going opposing directions for shipping; remove one fixture and reverse the cord so they may be inter-connected around one end (either end – user preference)
- Dimmer knob increases intensity as you turn counterclockwise (left) with maximum at 12 o’clock
- Never run full intensity on a new screen; start out with dimmer knob pointing straight down (6 o’clock position) and run light fixtures between 9 and 14 hours/day (generally)
- This item is required in order to operate the drain at as a “tuned siphon” (matched to input flow); otherwise, flow will be loud and gurgle, and may spill over to the secondary drain area.
- The drain will actually allow a higher flow rate as you close the valve and the air is purged from the pipe.
- The valve goes on the center-most drain, with the valve at the bottom of the pipe
- Cut the top of the pipe such that the bottom of the pipe is about 0.5″ to 1″ below the water surface
- Start with valve open (thumbscrew most of the way out)
- Turn on water flow and begin to tighten screw.
- Generally you will have 3 modes that you will see as you tighten the screw: 1) no active siphon (gurgling, with flow spilling over to secondary) 2) cyclical siphoning (siphon kicks in, air purges, box drains, air gets back into pipe and breaks the siphon, box fills and pushes air out, siphon kicks in, repeat) 3) steady-state siphon (cyclical siphon stops, water level stabilizes, no noise)
- You will still have bubbles until the screen matures; this is why I include the bubble blocker
- After tuning is done, install 2″ couple with thumbscrews over the bottom of the drain
- Slip drawstring filter bag over coupler and tighten down just to the point where it won’t fall off (not tight to the pipe)
- The mortar coating is a sacrificial layer (spread on top of a roughed-up plastic knitting canvas) that allows algae to quickly attach and get filtration actively working much faster than the standard roughed-up plastic canvas screen.
- Do not let the mortar screen dry out; it will become brittle and detach. Keep this in the bag until ready for use, or in a container with water (RODI or tap water) until ready for use.
- Do not scrub the mortar coated area. It will detach over time as you harvest algae growth.
- Do not scrub the mortar coated area. I meant to repeat that.
- If you do scrub the mortar coated area, no big deal. It may just take longer for the screen to mature, but it will.
- Until the mortar is mostly detached, clean very gently. This can be anywhere from a simple swipe of your palm across the screen to dragging the scraper or a credit card across the screen, but not “chiseling” across the screen material (this will cause mortar to detach). Rinse under a slow running faucet with room temperature water (not a sink sprayer)
Screen cleaning during the initial break-in stages
- Clean the screen after the first 14 days, but this may only be a palm-swipe and a quick rinse.
- Don’t clean vigorously, ever. Even with a full mature screen, there are only a few circumstances under which you will ever scrub the screen completely clean!
- After the initial cleaning, cleaning every 10-14 days is usually OK. If the pattern of the canvas screen is still well defined visibly at 14 days (i.e. not a lot of growth), clean again as above and leave as much algae growth attached as possible.
- I don’t recommend exceeding 16-18 days between cleanings.
- It usually takes 4-6 weeks or more to get to the heavy scraping or “chiseling” stage of growth.
- Every system is different, and every screen matures differently – don’t expect that you will have the exact results as others, and give it time.
- Once mortar starts to detach (during screen cleaning), areas of the underlying plastic canvas will be exposed a little bit more with each cleaning. These areas will then begin to mature, and the same rules apply – don’t clean vigorously.
- Generally, always scrub the top edge (the area without mortar) with the stiff orange/white brush during every cleaning.
- Always remove the false bottom and clean it off during every cleaning.
- You don’t have to completely clean out the growth chamber of all growth; removing loose algae is good, but leaving some of the “slime” alone may actually help with the flow characteristics of the drain. As long as you can get the False Bottom in and out without issue, that’s all that is really important.
Warning…it’s really old, and ugly. But there are a few things in there worth reading.
Rio Pumps
- Do not connect the hose directly to the pump outlet; the hose will fit over the outlet, but it can easily slip off under pressure (and a zip tie or hose clamp will not help much)
- Use the adapter that comes with the pump to connect to the vinyl hose
- The adapter is 2 parts: a slip-to-male-thread adapter, and a female-thread-to-hose-barb adapter.
- The 2 parts are usually already screwed together in the box but may be separate
- There are 2 of these types of adapters in the box: one for 3/4″ ID hose (use this), the other is for 1″ ID hose
- Never shut the pump off except during maintenance/cleaning
Vinyl Hose
Please note: Vinyl hose is currently not included with my Algae Scrubbers.
Depending on where the hose came off of the reel, some of it is rather flattened. Regardless of whether this is the case of not, I recommend placing the hose in hot water to allow it to relax and be molded to the exact shape you need for your setup. When the hose is hot, it is very malleable – you can get it to bend and turn exactly how you want it, and when it cools, it will retain that shape very well.
Here are the steps I recommend:
- Position your scrubber into the final intended installation location
- Position pump in the intended installation location
- Fill a large cooking pot with water and heat it up to the boiling point
- Turn off heat. If using an electric burner, remove from the burner
- Always use tongs to place the hose into the water, or remove it from the water
- Place hose in water, allowing all the air to escape
- Soak for about 20 or 30 seconds
- Remove hose from water with tongs. Hose will be very hot, and will be pretty much like a wet noodle. Be careful! It is easy to burn your hands if you grab on to the hose right away after removing from the water!
- Let the hose cool a bit (maybe 15 seconds or so), so that you can handle it
- “Dry fit” the hose without pushing it on to any hose barb fittings (i.e. hold it next to the barb fitting)
- Cut the hose to the appropriate length
- Place the hose back into the hot water for 15-20 seconds (you should not need to re-heat it at all)
- Remove the hose from the water and install it as desired (form shape, push on to hose barb fittings)
- When hose cools, it will shrink down onto the hose barb fittings and also hold the shape you have formed
- Install zip ties
- If desired, cut hose and install control valve (the Two Little Fishies black & green valve). You can dip the ends in hot water for 5-10 seconds to soften them (use a coffee cup for this)
More questions? Join the forum and search for an answer to your question, or ask away!